场景
有的时候流程图中的节点是多样化的
效果
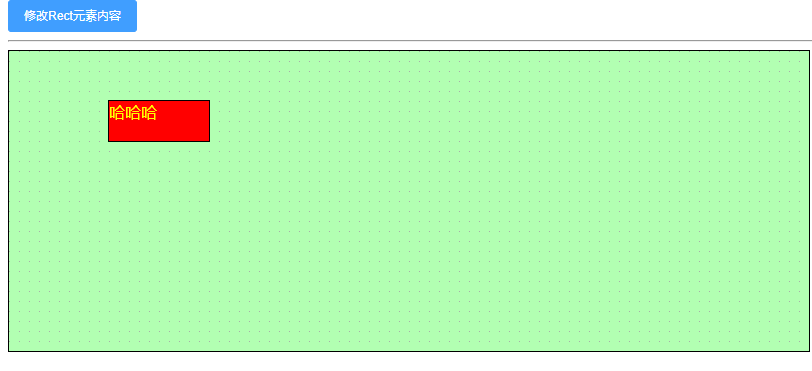
代码
<template><div class="app"><el-button type="primary" size="small" @click="updateRectContent">修改Rect元素内容</el-button><hr /><div ref="myholder" id="paper"></div></div>
</template><script>
import * as joint from '@joint/core'
export default {data() {return {graph: null,}},mounted() {const namespace = joint.shapesvar graph = new joint.dia.Graph({}, { cellNamespace: namespace })this.graph = graphvar paper = new joint.dia.Paper({el: this.$refs.myholder,model: this.graph,width: 800,height: 300,cellViewNamespace: namespace,drawGrid: true,gridSize: 10,background: {color: 'rgba(0, 255, 0, 0.3)',},// 禁止交互interactive: false, // disable default interaction (e.g. dragging)// 当mousemove事件的数量超过clickThreshold时,在mouseup之后不会触发pointerclick事件clickThreshold: 10,})// paper.on('element:pointerclick', function (elementView) {//   console.log(elementView)//   // var currentElement = elementView.model//   // currentElement.attr('body/stroke', 'orange')// })// const node1 = this.drawRect({ x: 50, y: 30 }, '流程-1')// const node2 = this.drawRect({ x: 200, y: 30 }, '流程-2')// const node3 = this.drawRect({ x: 350, y: 30 }, '流程-3')// const node4 = this.drawRect({ x: 500, y: 30 }, '流程-4')// const node5 = this.drawRect({ x: 50, y: 100 }, '流程-1.1')// const node6 = this.drawRect({ x: 350, y: 100 }, '流程-2.1')// const node7 = this.drawRect({ x: 350, y: 150 }, '流程-2.2')// const node2_to_node6_vetices = [new joint.g.Point(250, 100)]// const node2_to_node7_vetices = [new joint.g.Point(250, 150)]// this.drawLine(node1, node2)// this.drawLine(node2, node3)// this.drawLine(node3, node4)// this.drawLine(node1, node5)// this.drawLine(node2, node6, node2_to_node6_vetices)// this.drawLine(node2, node7, node2_to_node7_vetices)// 双击元素时触发// paper.on('element:pointerdblclick', function (elementView) {//   console.log(elementView)//   var currentElement = elementView.model//   console.log('currentElement:', currentElement)//   currentElement.attr('body/stroke', 'orange')// })// 单击元素时触发// paper.on('element:pointerclick', function (elementView) {//   console.log(elementView)//   // var currentElement = elementView.model//   // currentElement.attr('body/stroke', 'orange')// })// 创建可以自定义html的方法// joint.shapes.html = {}// joint.shapes.html.Element = joint.shapes.basic.Rect.extend({//   defaults: joint.util.defaultsDeep(//     {//       type: 'html.Element',//       attrs: {//         rect: { stroke: 'none', 'fill-opacity': 0 },//       },//     },//     joint.shapes.basic.Rect.prototype.defaults//   ),// })const element = new joint.shapes.standard.Rectangle()element.position(100, 50)element.resize(100, 40)element.addTo(this.graph)var bbox = element.getBBox()var clientRect1 = paper.localToClientRect(bbox)// alternative method signaturevar clientRect2 = paper.localToClientRect(bbox.x,bbox.y,bbox.width,bbox.height)// Draw an HTML rectangle above the element.var div = document.createElement('div')div.style.position = 'fixed'div.style.background = 'red'div.style.left = clientRect1.x + 'px'div.style.top = clientRect1.y + 'px'div.style.width = clientRect1.width + 'px'div.style.height = clientRect1.height + 'px'const text = element.attr('label').textdiv.innerHTML = `<span class='yellow'>哈哈哈</span>`// console.log(element.attr('label'))paper.el.appendChild(div)// clientRect1.on('element:pointerclick', function () {//   console.log(11)// })},methods: {drawRect({ x, y }, text) {var rect = new joint.shapes.standard.Rectangle()rect.position(x, y)rect.resize(100, 40)rect.attr({body: {fill: '#2c3e50',},label: {text,fill: '#3498DB',fontSize: 18,fontWeight: 'bold',fontVariant: 'Microsoft YaHei',},})rect.addTo(this.graph)return rect},drawLine(node1, node2, vertices) {var link = new joint.shapes.standard.Link()link.source(node1)link.target(node2)link.addTo(this.graph)if (vertices) {link.vertices(vertices)link.router('orthogonal')// link.connector('rounded')}// link.vertices([//   new joint.g.Point(250, 100),//   new joint.g.Point(280, 100),//   new joint.g.Point(300, 120),// ])//link.attr({line: {stroke: 'gray',},})},updateRectContent() {console.log(this.graph)// console.log(this.graph.getElements())const elements = this.graph.getElements()console.log(elements[0])// 获取原来的文本// console.log(elements[0].attr('label'))const node_1 = elements[0]node_1.attr({label: {text: '测试',},})},},
}
</script><style lang="less" scoped>
#paper {border: 1px solid;
}/deep/.yellow {color: yellow;
}
</style>